Choosing Wheelbarrow – Learn About Different Types

Choosing Wheelbarrow

Choosing the right wheelbarrow can be tough. There are many factors to think about when making this decision, and they all will affect how you use your wheelbarrow in the future.

At some point, most gardeners will find that they need a wheelbarrow to accomplish certain gardening tasks. Wheelbarrows are used for a variety of things, such as moving rocks, mulch, or compost into the garden, moving trees or large shrubs from one place to another, hauling bricks, disposing of garden waste, or even mixing concrete or fertilizer. Not all wheelbarrows are the same, however. The type of wheelbarrow you should buy depends on the tasks you need it for. If you’re looking for a few pointers on what types of wheelbarrows are out there, read on!

Continue reading →

How to Make a Concrete Garden Path

Concrete Garden Path

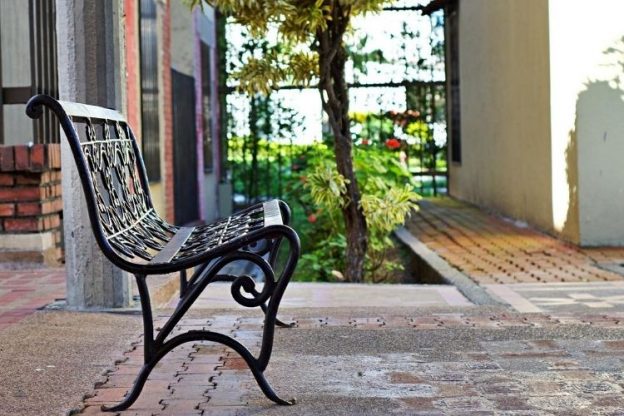
A garden driveway or concrete walkway is a common element of a personal plot. In addition to aesthetic functions, concrete paths are needed to comfortably move not on open ground, but on a hard, clean surface. They are often made by hand.

Material, tools

Concrete is one of the most practical and durable materials: it can be given any shape, color, embossed surface, it does not crack, does not crumble, frost and water resistance. For kneading, you need the following materials:

  • water, cement and sand;
  • gravel, crushed stone, pebbles;
  • stones or decorative items;
  • pigment (if you need to add color) and plastic wrap.

You will also need a wide range of tools:

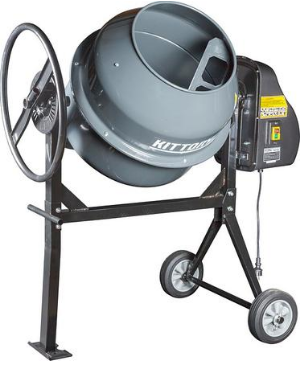
  • concrete mixer or container for mixing the solution;
  • a sieve for sifting sand or a container for washing it;
  • shovel, stirring paddle, planks or formwork;
  • hammer, nails to create formwork;
  • rubber mallet, stakes and lines for marking;
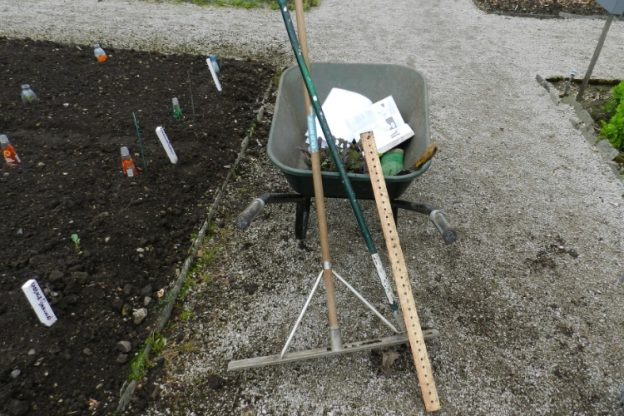
  • long rule, building level;
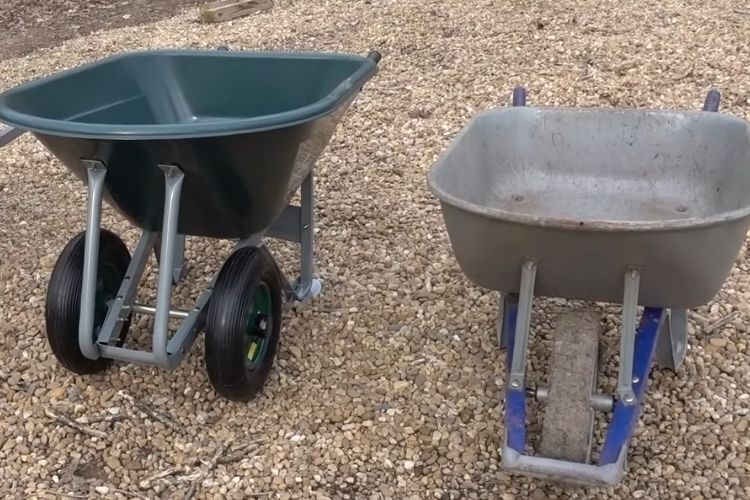
  • rammer, trolley, trowel, buckets;
  • grinder, steel sheet, reinforcement, steel mesh or fiber;
  • knee pads, gloves.

Some tools and devices may not be needed. For example, if the sand is clean, no sieve is needed.

General requirements

Correct foundation is essential. So, for clayey soils and under heavy load, a depth of about 50 cm for the base and a sand cushion of 30 cm are recommended.For heavy soil, a sand-gravel mixture of 30 cm is suitable, in it the sand layer should be 15 cm.Each layer of gravel, crushed stone , the sand is well tamped and watered.

The bottom of the trench is compacted and geotextiles are laid. It is also laid between layers – this increases the strength of the base and its service life, since the material is specially created for construction in permafrost conditions. It is very strong and prevents the washing out of sand, subsidence, excludes the growth of weeds and passes moisture well.

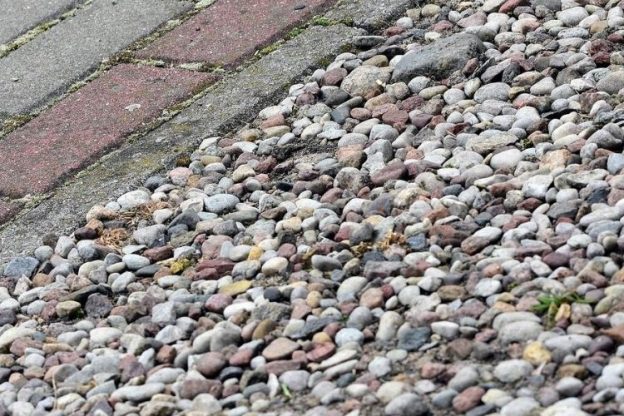
For paths made of concrete slabs, sand is taken for the base with a fraction of 0-7 mm, it is poured with a layer of 5-7 mm and leveled. If it is necessary to make gaps of 2–3 cm between the plates, then they are covered with fine-grained sand, rammed and spilled with water. Concrete paths must have a slope so that water does not linger on them. To do this, make a base with a slightly convex profile – it is enough to make a slope of 1-2 cm per 1 m of the track axis. They also make special drainage. To determine the size of the steps, there is a rule: two step heights plus the depth are equal to a step of 60–70 cm. The walkway can be created from slabs 40 × 40 cm at a step distance between the centers of the slabs.

Track creation process

Let’s describe the standard scheme for creating a track and material consumption. The parameters of the base and the solution vary depending on the soil of the site.

Foundation preparation

The concrete must be placed correctly, that is, on a sand and gravel layer. Although sometimes, when there is sandy soils, they are simply laid on a well-tamped pillow, while the consumption of materials is reduced. They begin to work with the creation of markup. Pegs are driven in along the perimeter of the future track, and the cord is pulled. The top layer of the soil is removed. For pedestrian paths, 20 cm is enough, if cars will drive on it – 30 cm, for heavy and loamy soils – 40 cm. Then geotextiles are laid on the bottom and slopes.

Half of the trench is covered with sand. If there are several layers, then a third. In any case, for a sandy layer, preferably at least 5 cm. It is well rammed, spilled with water. The ideal option is to deepen the trench and use several layers: sand / gravel (crushed stone) / sand. Each layer is overlaid with geotextiles.

If there are multiple layers, then the next one should be gravel. Crushed stone with a fraction of 10–20 mm is taken, which must be well compacted. In order to properly concreted the track, its dimensions or slabs in m2 and the approximate proportions and consumption of the constituent concrete are calculated.

Form for concrete slabs, formwork

For making slabs with your own hands, special plastic forms are sold. If they are not there, then you can do it yourself. Plates are often made square with sides of 30-50 cm. For them, wooden forms are created from bars with a cross section of 50 × 50 and sheets of steel. In total, their volume should be equal to concrete in one batch. The bars are knocked down with nails, polished from the inside and applied with oil paint – so the plate will not get stuck.

Simplified manufacturing method: a form without a bottom on a plane covered with a film. Concrete walkways can be made using formwork, a temporary timber structure that shapes the mortar. It is made from a board 15–20 mm wide, which is equal to the height of the track. The path should be slightly higher than the ground (4–5 cm) and with a slope of 1 cm to one or both sides.

The boards are fixed at the edges of the trench – they are pressed against the walls and attached to the marking pegs; the latter should be on the outside. The edge of the boards from below is fixed by means of pegs, and the top – with transverse jumpers, they are nailed to the edges from above – this will exclude the expansion of the structure.

It is necessary to separate the slabs – too large ones crack. To do this, after one and a half meters, dividers are mounted: metal plates, siding trims, wooden or plastic strips. If they need to be removed, then before installation they are lubricated with any grease (used machine oil).

Calculation of the amount of concrete

The calculation is done using this technology. The area of ​​one slab is determined (in m2). The m2 value is multiplied by its height. The result is multiplied by the required number of plates. When filling the site with a single mass, the area in m2 is multiplied by the thickness of the filling. If the slabs are laid with gaps, then 5-10% is subtracted from the result.

The standard width of the path in the country will be 0.8 m with a thickness of 5-7 cm, for a path for a car you need 3 m with a thickness of 10 cm. Taking this into account, it is easy to calculate that the consumption of the mixture per 1 running meter of the footpath is 0.5 m3, for a path for a car consumption – 0.3 m3 of concrete. From this it follows that 1 m3 of mortar is enough for 20 m2 of a footpath or 3.3 m2 for a car.

Composition calculation

The components and proportions are measured with buckets. A standard bag of cement has 50 kg or 38 l. The best water consumption will be in the proportion of 1 part water to 4 cement, but as you stir, you can add a little more water to the composition for better plasticity. The solution and consumption of ingredients for paths without heavy loads (normal path in the patio, in the country): ½, 5/4 (cement / sand / gravel). In buckets, the proportion will look like this (per 1 m3 of mixture): 18 – cement (4.7 bags), 45 – sand, gravel – 70.

Car track: 1 / 1.5 / 2.5 (cement / sand / gravel). Consumption in buckets: 28 (or 7.3 bags) / 40/70. A plasticizer is also added, for example, SP-1, a dye (1-2% by weight of the solution). There is one more composition of durable concrete mortar:

  • cement M500 and above – 1 part;
  • sand – 3 parts;
  • crushed stone – 1 part;
  • water-repellent additives.

Mixing concrete

If there is a small concrete mixer, it simplifies the work. If it is not there or the amount of concrete is small, then you can mix it by hand. Concreting tracks is carried out in several stages. To mix the mortar, you need a trough, a steel box or just a flat asphalt area, an iron sheet. You can use a construction mixer, a hammer drill with a nozzle.

Best electric cement mixer

This technology is standard. First, gravel and sand are mixed, then cement is added – a gray mass is obtained. A deepening is made on its top and water is slowly poured in (half the calculated volume), raking the dry mixture from the edges into the middle. The mixture will become damp. Then they make a depression at the top again and pour out some of the water. Do this several times until the composition becomes the desired consistency.

For the manufacture of the mortar, cement of a brand not lower than M300 is recommended. It is best to use river sand – it is clean. It is advisable to rinse the quarry and filter through a sieve. Crushed stone can be taken 10–20 mm in size, the best is granite, it is frost-resistant and durable. For heavy loads, a coarse fraction of 40 mm is suitable.

The thicker the composition, the stronger the concrete, but then it must be well tamped. An excellent solution would be to add a plasticizer – it will make hard concrete more plastic and flowable with less water consumption, which makes it less durable. This solution will fill all the cracks.

Reinforcement and pouring

A garden or courtyard path made of concrete should rise by 3-5 cm. If there is a desire to give the slabs special strength, then reinforcement is used:

  • the form is filled in half;
  • put reinforcement. Its role is played by steel rods with a cross section of 5–8 mm or a finished mesh. Fiber from the polymer is also used, which is added when mixing concrete.

The solution is leveled and kept for 3-4 days, regularly pouring water or covering with a damp cloth. When reinforcing, you can restrict yourself to a slab thickness of 6–10 cm: such a device excludes cracking. Otherwise, the thickness of the slab is at least 10-15 cm.

Pouring and ramming the tracks with concrete occurs in stages from separator to separator. The solution must be poured all at once to the edges of the formwork, the prepared mixture cannot be left for later – this is a guarantee of its cracking.

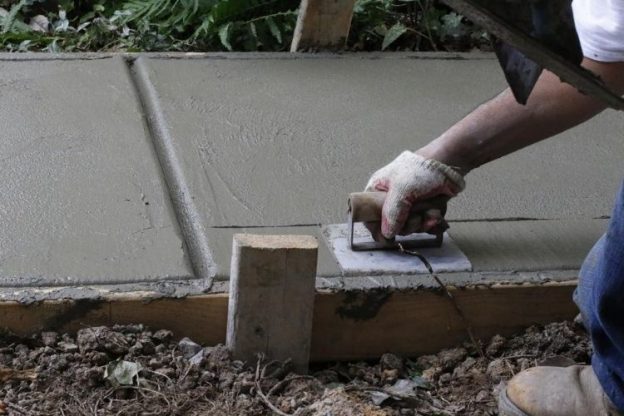
The top layer is leveled with a rule or a flat board, which rests on the edges of the formwork and travels along them. The rule is to make movements towards themselves along the path, removing excess mixture. When leveling, remember the slope (1 cm by 1 m). You will also need manual ramming, which should be carried out before the appearance of the cement milk.

Then the mixture is pierced with a pin, a piece of pipe – this is necessary to remove air and increase the density. For this, a vibrating screed is also used. If pebbles have turned out, then they are rolled with a roller. After that, the concrete is covered with a film from debris, rain, to preserve moisture (rapid drying leads to cracking). So, the concrete path dries for 4 days, for 5 – the formwork is removed. Until it is completely dry, it is poured with water, and after drying, the sharp edges are polished with a grinder.

Laying slabs

If the path in the country will be exposed to heavy loads (bicycles, cars, a cart with a load), then it is advisable to leave a gap of 2-3 cm between the plates. You can also leave a gap of 5-6 cm. You can also place the plates at intervals of 1 step. Laying process in stages:

  • pegs and cords make markings;
  • remove the soil layer by 10 cm;
  • the trench is covered half the depth with sand;
  • the plates are laid on a leveled, rammed base. It is important that each slab lies on the sand
  • cushion with its entire plane and is at the level of other tiles;
  • hammer slabs across the board for a good fit;
  • sand is poured into the cracks. Can also be decorated decoratively.

Plates look good in the country, between which lawn grass grows. Such a path is made on the finished lawn: the sod is cut out, the bottom of the hole is filled with sand so that the slab is flush with the grass.

Decorating

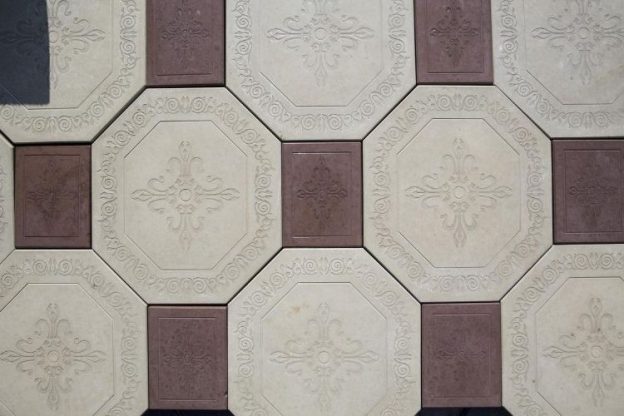
For a path in the country, a beautiful view is very important. To make it beautiful, decorative, pigments are used (ocher, umber, etc.), polished by impregnation, and drawing with sharp objects is applied.
You can decorate using pebbles, shards of tiles, even buttons. They are embedded in the concrete surface. To do this, a paper sheet is placed on the bottom of the mold, decorative elements are attached with glue and poured with a solution. The paper is washed off the finished plate with water.

Impregnation with liquid glass (fluoride silicate, sodium, adhesive) is also popular, which gives a spectacular shine. All impregnations are applied by brush or spray. If desired, you can make large veins and fill them with turf, create roughness with a stiff brush or other devices. Cladding with tiles or marble is in great demand.

Five Things Gardeners Must Do This Fall

Five Things Gardeners

How to tidy up your garden before winter comes? How not to miss anything, but at the same time get rid of unnecessary hassle? We have made a detailed plan! Our list will help you put everything on the shelves and minimize the time wasted.

Removing foliage

cleaning foliage

To clean or not to clean? That is the question for budding gardeners. Opinions are divided. Some experts say: fallen leaves protect the root system, so it is not worth raking it from the site. Advocates of careful autumn harvesting suggest using rotten leaves to fertilize the soil. To do this, collect moss, dry grass, tops and leaves and make a compost heap. The only condition is that the trees must be healthy. If they are infected with something, the leaves must be collected and destroyed. As well as fallen or rotten fruits left on the branches. It is very difficult to put in order the site without special tools. Therefore, we stock up on everything you need!

Garden cleaning equipment

We remove the site with ease and minimum time. Modern household appliances come to the rescue. It makes it much easier to care for lawns, flower beds and paths.

  • We use best leaf blowers and garden vacuums to carefully collect leaves and small plant residues. Blowers, as the name suggests, blow out a stream of air. This allows you to collect fallen leaves in piles and then compost them. Some models are equipped with bags. Their principle of operation is the same as that of garden vacuum cleaners – all debris is drawn in.
  • We dispose of small branches, foliage, grass, using garden shredders.

Garden rake

Needed for cleaning the garden from dry grass and leaves. They are very convenient for working in hard-to-reach places under trees or bushes. On sale – models with flat or round teeth, they do not damage young plants and grass cover.

Pruning fruit trees

Pruning fruit trees

We do this only in dry weather and certainly before severe frosts. If pruning is performed at temperatures below –10 ° C, the wood will crack and the tree may die.

  • First of all, we free the trees from sick, broken, dry branches. We also get rid of the branches growing inside the crown. We try to make the cut as smooth and even as possible. After trimming, we protect the cut site and process it, for example, with a solution of copper sulfate (1 tsp per 1 liter of water), and then with a garden pitch.
  • We look for lichens, moss and dead bark on the trunks and remove them immediately. Indeed, it is in such places that pests winter.
  • Are there trapping belts on the trees? We shoot. We burn disposable, and wash and hide the reusable ones until the onset of heat.

Again, we need an arsenal of special tools.

The most popular are hedge trimmers, loppers and shears

  • Loppers and pruners (garden shears) will help you cut the branches. If only young trees are growing in the garden, one of these tools will suffice for the job.
  • With the help of hedge trimmers, shrubs are cut, hedges are looked after. You can buy manual, electric, gasoline and battery models.
  • Where the pruner fails, you will need garden saws and hacksaws. Even the thick branches are in their teeth. These tools will make a neat cut without damaging healthy wood.

We cover plants for the winter

Roses, vines, grafting of standard plants and many others need shelter. The choice of covering material depends on the characteristics of a particular plant, climate, weather forecast for the winter. Gardeners use spruce branches, ordinary straw, burlap, as well as special modern materials. Do not forget about mulching, covering the soil surface. This is especially needed by the trunks of fruit trees prone to freezing.

We fight pests and protect plants

  • We get rid of fungal formations, powdery mildew, scab, spores of pathogenic microbes – in October we spray tree trunks with fungicide preparations.
  • With the onset of stable frosts, we tie the young trees with cut branches of blackberries, raspberries, tar paper, spruce branches or a net. This will protect them from rodents.
  • We are whitewashing trees, covering the entire lower part of the trunk with a special compound. This will protect plants from damage by insect pests, protect against diseases, the appearance of frost damage (tissue rupture), arising from the difference in day and night temperatures in February. We carry out this type of work in October-November only after careful removal of dead bark and moss.

Fertilize

We feed the garden in October. And at the same time we dig up the soil around the trunks. This will allow the root system to breathe, and also destroy the wintering of pests. Which fertilizers to choose, organic or mineral, is up to you, but you must do it. If the soil becomes scarce, you will only have to dream about harvests. All information about the rules of fertilization is on the package. The indicated dose should not be increased: it is better to underfeed than to fertilize in excess.

Mineral

Mineral fertilizers for autumn use should contain a minimum amount of nitrogen, but calcium, potassium and phosphorus are needed in sufficient quantities. To find out that these are exactly the fertilizers that are needed, the inscription “autumn” on the package will help.

Organic

If you only prefer organic food as a top dressing, also do not forget about the norms.

Paving Slabs for Garden Paths

Paving Slabs for Garden Paths

In terms of the totality of its qualities, paving slabs for summer cottages deserve to be considered one of the best materials for paving. The variety of colors, sizes and shapes allows you to create artistic compositions that add sophistication to even the most ordinary landscape. The presence of various manufacturing technologies – vibrocasting and vibrocompression – makes it possible to choose the best option for operating conditions, price and durability. All this provides paving slabs with a high and stable demand among consumers of different levels of income.Continue reading →

Gravel Paths: How to Do it Yourself

Gravel Paths

In some cases, pebble or gravel paths are a good alternative to paved surfaces. Unlike the latter, they do not require large expenditures. They are not afraid of negative temperatures with soil swelling, to which hard coatings are so sensitive.

An additional argument in their favor is that technologically the construction of gravel paths is the initial stage of the construction of a paved surface. If the owner of the plot eventually has a desire to lay stone, paving slabs or clinker paving stones, he can always do this without losing the result of the work already done.

Continue reading →

DIY Lighting Paths in the Garden

Lighting Paths in the Garden

Sooner or later, every owner of a summer cottage or private house thinks about the need to equip the lighting of paths in the garden. And the motivating motives lie not only in the desire to decorate the territory in an unusual way, but also in the elementary desire to move safely through it at night.

With the help of small lanterns, gradients of colors and shadows are combined, alpine slides turn into fabulous oases, and small corners of the garden turn into mysterious thickets.Continue reading →

How to Make Garden Paths From Rubble With Your Own Hands

Garden Paths From Rubble

Owners of private houses or summer cottages know: if it rains, then there will be dirt on the local area – especially if the sun is not visible for a long time. Often, instead of real paved garden and summer cottage paths, the construction of which is relatively expensive, many summer residents welcome … a crushed stone path!

Crushed stone embankments provide more convenient movement around the site and transportation of goods on carts. In addition, the crushed stone paths look very neat, giving the entire site a well-groomed look, and you can equip them on your own.Continue reading →

How to Make a Paving Area Around the House

Paver Walkways around the House

To protect the foundation and walls of the house from destruction due to high humidity, it is necessary to ensure the drainage of upstream water from the area immediately adjacent to the building. The paving area not only successfully solves this problem, but also ennobles the house, emphasizing its style features. In addition, when installing a paving area around the house, a hard surface area appears that can be used as a path, a place for storing garden equipment and in other useful ways.

Building Paver Walkways around the House

Basic requirements for the blind area

First of all, it must successfully fulfill the main task – to divert the riding water from the foundation. To do this, she needs to have a certain water resistance. The degree of this waterproofness is determined by the materials and technology that are used when installing the blind area.

The width of the paved surface can vary from 1 m (on sandy, slightly swelling soils) to 2 m (on loamy, heaving soils).

The blind area around the house made of paving stones must necessarily have a slope directed away from the building. Its value is assumed to be 1.5-2%, which is 15-20 mm per 1 m of the paved surface width. This is enough to ensure a guaranteed drainage of water from the building.

Between the blind area and the foundation, it is necessary to provide a gap of 1-2 cm wide.Its need is caused by the fact that in winter the soil adjacent to the building swells and makes small vertical movements, while the foundation remains stationary. To exclude the destruction of the waterproofing of the foundation by covering the blind area, there must be a gap between them. Usually it is filled with sand, but other material that does not injure the waterproofing can be used. For example, expanded polystyrene or several layers of roofing material.

The height of the blind area affects the height of the base. It is recommended to choose the thickness of the blind area layers so that the height of the basement is at least 30-50 cm.

The choice of paving stones for the blind area

Depending on the requirements for the operational and design properties of the material, and the size of the budget allocated for this operation, stone, clinker or sand-cement paving stones can be used for paving the blind area.

Of course, a blind area made of granite paving stones or clinker is an excellent solution that can add chic to any home. But if we proceed from the fact that the movement of transport on the blind area is excluded, and the load on it will be small, it is economically expedient to use less expensive paving stones for this. In addition, the latter provides a wider choice of shapes and colors. Whatever design the facade of the building has, it will not be difficult to choose a suitable color composition from paving slabs for it. And it will be vibrocast or vibropressed – it completely depends on the preferences of the owner. As for the thickness of the paving stone, it can fluctuate in the range of 40 … 80 mm.

Blind area device

The technology for creating a blind area from paving stones may vary somewhat depending on the materials used. From time immemorial, clay was used in the construction of the blind area. It was she who formed a waterproof layer, which was a barrier to the penetration of moisture into the soil. Clay is still used today, but not as often as before. If necessary, you can do without it.

Structurally, the blind area consists of several layers of various materials laid in a trench dug along the perimeter of the house directly near the foundation. The depth of the trench is usually equal to the thickness of the fertile soil layer – 20-30 cm.The width, as already indicated, is from 1 to 2 m.

The bottom of the trench must be well compacted. Then a layer of clay (if used) is laid on it with a mandatory slope from the house. On top of the clay or soil, a layer of gravel 10-15 cm thick is laid, on it – a layer of sand 5-10 cm. The latter will serve as a substrate for paving stones.

Sometimes gravel is not used, replacing it with a thicker layer of sand. But it must be borne in mind that gravel is the material that practically does not swell. Therefore, its presence has a positive effect on seasonal soil movements that occur at subzero temperatures.

So that the water flowing down the facade during rain and snow does not fall into the gap between the foundation and the blind area, an ebb tide is installed on its way in the lower part of the wall, which diverts water from the wall.

If a water-cut-off clay layer is not used, it is advisable to lay a cut-off roll waterproofing in the blind area. It is a sheet of some kind of waterproofing material (roofing material, for example), the upper edge of which is attached under the wall cladding, and the lower one fits into a sand cushion. Thanks to him, water that will penetrate the paved surface will be diverted away from the foundation. If the outer surface of the latter is waterproofed (treated with bitumen or other waterproofing material), roll cut-off waterproofing can be dispensed with.

Laying paving stones

Laying paving stones around the house is practically no different from paving other surfaces. This operation is within the power of anyone who likes to work with their own hands. The masonry goes from the wall – with a deviation of 1-2 cm from it. The position of each stone is adjusted with a rubber mallet. It is necessary to ensure that the paving stones lie tightly, buried in the sandy pillow. And, of course, we must not forget about the obligatory slope to the edge. The gaps between the stones are maintained 3-5 mm.

Useful advice. The paving area around the house works very effectively in conjunction with storm drainage. Arranging the latter is not difficult. In a small trench dug along the edge of the blind area, drainage concrete or plastic trays are installed, covered with a lattice on top. All the water flowing from the blind area will be diverted by these trays into storm wells. As a result, the soil adjacent to the foundation will be in a drier state.

Along the edge of the site, a curb is installed flush with the surface of the blind area. It will not allow the extreme row of stones to go to the side and will give the blind area a more neat look. At the end of the laying, the gaps between the paving stones are filled with sand screenings.

In conclusion, it is advisable to tamp the surface with a vibrating plate with a rubber or polyurethane lining. This will compact the blind area well and give its surface absolute evenness.

How to Make Colored Paving Slabs

manufacture of paving slabs

Color is an incredibly powerful and effective design tool. Colored paving slabs, laid on the paths and the area in front of the house, are able not only to transform the surrounding landscape, but also to emphasize and set off in the most beneficial way the architectural merits and style of the building itself.

A huge advantage of this material, which contributes to even greater demand, is that it can be relatively easily made at home without the use of any special equipment. Lesson is not only useful, but also interesting, capable of bringing great creative satisfaction.Continue reading →

Choosing Paving Slabs for Parking

Today, when almost every family has one or even several cars, tile for parking in the country or in a country house is a very popular material. Proper improvement of the territory near the house requires the mandatory presence of a parking space for the car. This can be a zone arranged separately from pedestrian paths, or the entire space in front of the house and garage is made out using materials and technologies that provide increased load-bearing characteristics of the surface. A car shining with cleanliness in any weather, the convenience of its operation and maintenance is a worthy reward for the expenses and troubles of a paved parking device.Continue reading →