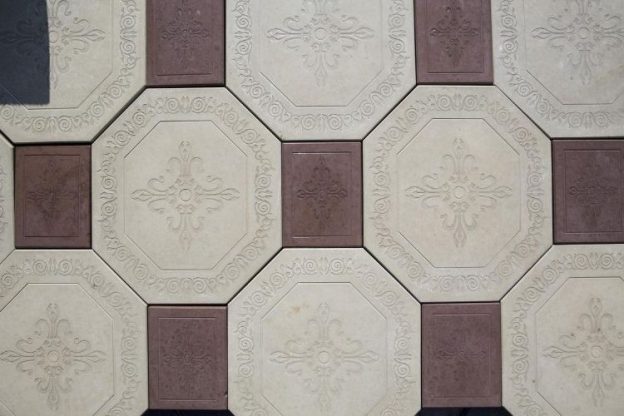
Color is an incredibly powerful and effective design tool. Colored paving slabs, laid on the paths and the area in front of the house, are able not only to transform the surrounding landscape, but also to emphasize and set off in the most beneficial way the architectural merits and style of the building itself.
A huge advantage of this material, which contributes to even greater demand, is that it can be relatively easily made at home without the use of any special equipment. Lesson is not only useful, but also interesting, capable of bringing great creative satisfaction.
How to make vibrocast paving slabs
How do you paint paving slabs?
Usually, it is not the tile itself that is painted, but the concrete from which it is formed. Pigments are used as dyes – powdery substances obtained in various ways. From metal salts (metallic pigments), by crushing rocks (inorganic dyes) or from synthetic chemical compounds.
Most often, iron oxide coloring pigments are used – inorganic synthetic substances containing iron oxides. They do not dissolve in water, forming a finely dispersed emulsion. When making proportions, they are guided by the amount of cement, and not by the total mass of the solution. Usually the weight of the dye is 3-5% of the weight of the cement. The higher the percentage, the more saturated the color is.
You may have to experiment with different pigments and their ratios to get the shade you want. But the reward will be beautiful multi-colored paving slabs, in perfect harmony with the emerald greenery of the garden and the facade of the house.
Important. The color of the concrete mass is influenced not only by the brand of the pigment and its amount, but also by the color of the cement. Gray Portland cement, for example, reduces saturation, mutes color tones. If you want to get bright and rich colors, you need to use white cement.
Colored tile manufacturing technology
Do-it-yourself colored paving slabs are made using vibrocast technology. Unlike vibrocompression, it does not require any special equipment. The solution is poured into plastic molds, since after pouring the mixture must be kept for 2-3 days before being removed from the mold, to speed up the manufacturing process, it is desirable to have as many molds as possible that can be poured at one time.
From the point of view of the painting operation, the production of colored paving slabs can be carried out in two ways. Painting the surface of already laid tiles or introducing a dye into the solution during its preparation. In this case, a persistent volumetric color of the tile is obtained. It is most often used.
Form preparation
The inner surface of the mold must be completely cleaned of mortar residues. To prevent the mixture from sticking to the walls, the inner surface must be lubricated with a thin layer of some kind of lubricant, for example, by “working off” engine oil. Wipe the entire surface with a cloth or brush dampened with oil, paying particular attention to the corners. They are easiest to handle with a brush.
Component ratio
Colored concrete tiles are made from the following materials:
- cement grade M500;
- coarse sand;
- water;
- pigment;
- plasticizer (optional, but desirable).
The ratio of cement to sand is usually taken as 1: 4 or 1: 3. The amount of water depends on the moisture content of the sand. When using a plasticizer, the minimum amount of water per kg of cement is approximately 0.5 l. If no plasticizer is used, the volume of water is increased to 1 liter. The specific value is determined empirically. The amount of pigment, as already noted, is 3-5% by weight of cement, plasticizer – according to the instructions.
Solution preparation
Sand and cement are poured into the mixing container, after which the mixture is well mixed. It is best to do this, of course, with a concrete mixer or a large mixer, but, as a last resort, a shovel will do.
Now comes the most important moment that answers the main question – how to make paving slabs colored. Water is poured into a clean container, pigment and plasticizer are added to it, and all this mixes well. In no case should the pigment be poured into a dry solution separately, since in this case it will not be possible to evenly distribute it throughout the entire volume. The resulting colored liquid is poured into a sand-cement mixture, and the solution is thoroughly mixed.
Important. It is highly desirable that the mixture is hard, that is, not liquid, with a small amount of water. The addition of a plasticizer is exactly what is needed to ensure good stacking of the stiff mixture.
Filling out the form
Since the prepared mixture should be thick, vibration is indispensable when laying and leveling it. If there is no vibrating table, you will have to create it with your hands – shake the form, tap it on the table, or knock something on the table. Compaction of the mixture is considered complete when air bubbles cease to appear on the surface, and it becomes even and smooth.
The filled forms must be covered with polyethylene so that the water does not evaporate. At an air temperature of about 20 ° C, it will take at least 2-3 days for the initial hardening, when the tiles can be removed from the mold. Before paving, the material should be kept somewhere in the shade for a couple of weeks.
Conclusion
To support the weight of a person, the tiles only need to be 30 mm thick. But what if a car is planned to move on paved surfaces? There are two ways. To produce reinforced tiles by laying a steel mesh when pouring into a mold. Or increase its thickness to 6 cm or more. The result will be a kind of colored paving stones that can easily support the weight of a car.
